


¿Alguna vez te has preguntado si podrías hacer tus propias herramientas de maquillaje?? En ese caso, no estas solo. Muchos entusiastas de la belleza sienten curiosidad por saber cómo crear sus propias brochas de maquillaje para lograr una experiencia verdaderamente personalizada.. La creación de pinceles personalizados le permite adaptar cada aspecto, desde el tipo de cerdas hasta el diseño del mango, asegurando que sus herramientas satisfagan sus necesidades exactas.. En esta guía, Te guiaremos a través del proceso de diseño y fabricación de tus propios pinceles., proporcionándote el conocimiento y las habilidades para mejorar tu rutina de belleza con un toque de estilo DIY.

Paso 1: Conozca los conceptos básicos de las brochas de maquillaje
Antes de embarcarnos en el emocionante viaje de crear tus propias brochas de maquillaje., comencemos con lo esencial. en esta parte, Le diremos los conceptos básicos de los tipos de pincel., materiales, y propiedades de las cerdas que prepararán el escenario para crear herramientas que sean hermosas y funcionales.
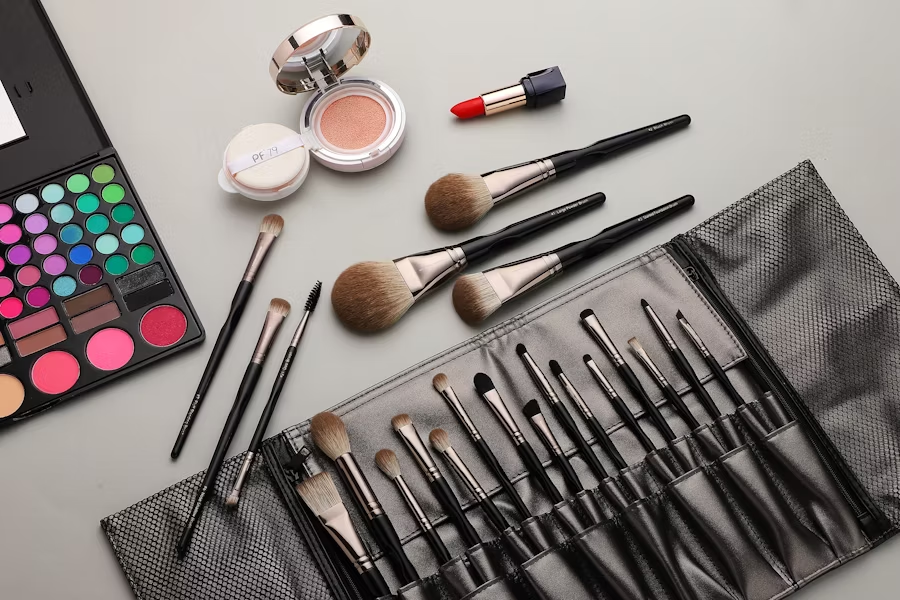
Descripción general de los diferentes tipos de brochas de maquillaje

Imagina cada pincel como una herramienta única en tu arsenal de belleza.. Conocer estos tipos te guiará en la selección de las formas adecuadas para tus creaciones personalizadas..
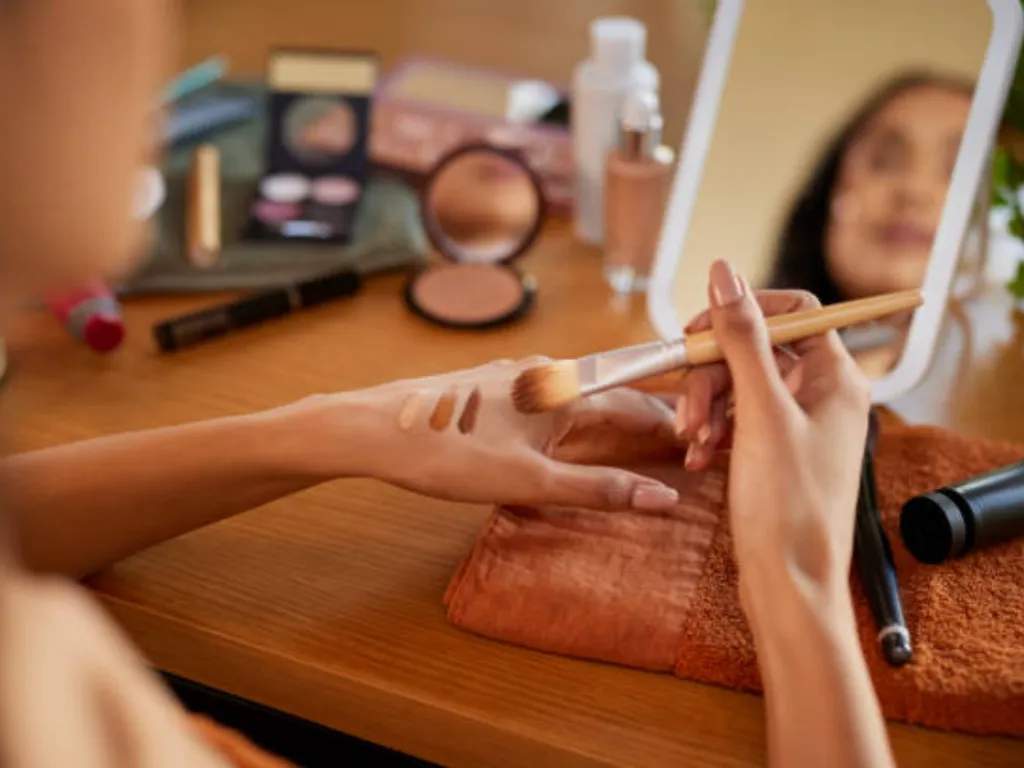
- Brochas para base, con su piso, cerdas densas, son perfectos para conseguir una base impecable.
- Brochas para rubor, con su forma redondeada, ayudarle a crear ese toque de color perfecto.
- Pinceles para sombra de ojos van desde pequeños, diseños precisos para trabajos detallados a mayores, opciones más esponjosas para mezclar.
Materiales utilizados en la construcción de brochas de maquillaje: cerdas, Manijas, y casquillos
Profundicemos en los materiales que componen tus pinceles..
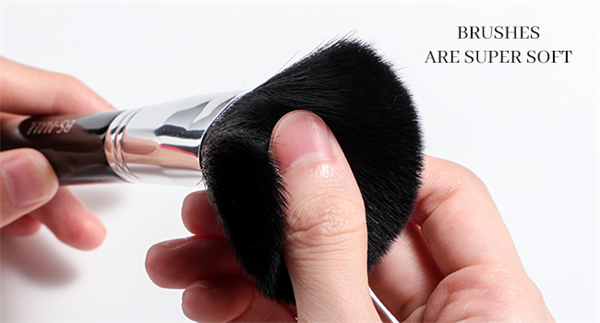
- cerdas puede ser natural, como pelo suave de ardilla o de cabra, o sintético, como nailon duradero. Cada tipo tiene su propio encanto.: las cerdas naturales son excelentes para recoger pigmentos, mientras que los sintéticos son fáciles de limpiar y perfectos para productos cremosos..
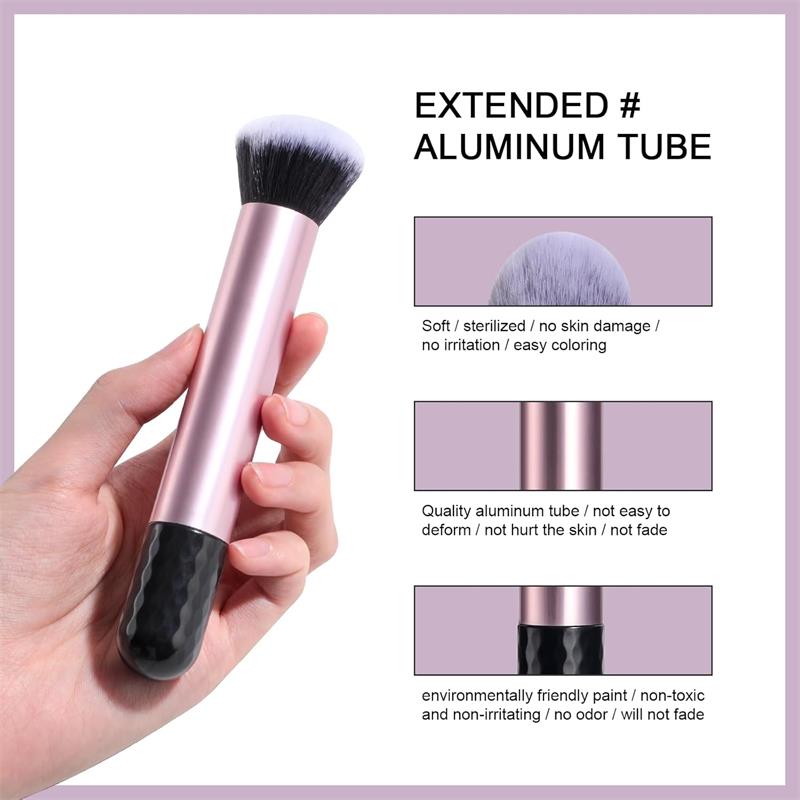
- Manijas se puede hacer de madera, plástico, o metal, cada uno ofrece una sensación y apariencia únicas.
- la virola, esa banda de metal crucial, mantiene todo junto, generalmente fabricado en aluminio o latón.
El papel de la densidad y la forma de las cerdas en la aplicación de maquillaje
Piense en la densidad y la forma de las cerdas como la personalidad del cepillo.. Hacer bien estos detalles garantizará que su cepillo funcione tal como lo imagina.
- Cerdas densas darle control y cobertura total, ideal para base. Las cerdas menos densas proporcionan un tacto más suave., perfecto para mezclar y difundir.
- la forma—ya sea redondo, departamento, o en ángulo: determina cómo interactúa la brocha con el maquillaje y la piel.. Por ejemplo, un pincel redondo es fantástico para difuminar, mientras que uno plano sobresale en la aplicación de sombreador de ojos..
Paso 2: Reúna materiales y herramientas
Ahora que ya sabes lo básico, es hora de reunir tus materiales y herramientas. Cada componente es esencial para crear un pincel que sea a la vez funcional y hermoso.. Exploremos qué necesitará y por qué.
cerdas: Naturales vs.. Sintético
Cerdas naturales, como los de pelo de ardilla o de cabra, son maravillosamente suaves y retienen el pigmento maravillosamente. Cerdas sintéticas, similar a cepillos ecológicos, a menudo hecho de nailon, Son más resistentes y perfectos para productos líquidos y cremosos.. Si buscas un cepillo que sea fácil de mantener y duradero, sintético podría ser tu opción. Para una brocha que se siente lujosa y funciona bien con polvos, considere las cerdas naturales.
Material del mango: Madera, Plástico, o metálico
Piensa en lo que te sienta bien en la mano y en lo que se adapta a tu estética.. Los mangos de madera ofrecen un clásico., agarre cómodo y un toque de elegancia, pero requieren un poco más de cuidado. Los mangos de plástico son livianos y rentables, mientras que las manijas de metal, como los de aluminio o latón, traer un moderno, tacto duradero.
Contera: Tipos de metales
la virola, a menudo se pasa por alto, es crucial para mantener las cerdas en su lugar. Los casquillos de aluminio son ligeros y resistentes a la corrosión., haciéndolos una elección práctica. Casquillos de latón, aunque más pesado, ofrecer un sólido, sensación de lujo.
Herramientas que necesitarás: Pegamento, Abrazaderas, y más
Para montar tu cepillo, necesitarás algunas herramientas esenciales. Es imprescindible un adhesivo fuerte para asegurar las cerdas a la férula.. Las abrazaderas ayudan a mantener todo en su lugar mientras se endurece el pegamento.. También necesitarás herramientas de corte para darle forma a las cerdas.. Tener estas herramientas listas agilizará su proceso y garantizará que todo se mantenga alineado..
Paso 3: Pincel de maquillaje de diseño
El diseño de pincel personalizado es donde brilla tu creatividad. Este paso consiste en decidir la forma., características de las cerdas, y diseño de manijas que se adaptan a sus necesidades y preferencias.
Forma de pincel personalizada: Redondo, Departamento, Angular, y más
La forma de su pincel afecta su rendimiento. Quizás te tome un tiempo decidir qué formas se adaptarán mejor a tu rutina de maquillaje.. Este paso puede tomar aproximadamente 2 horas, incluyendo ajustes y pruebas.
- cepillos redondos son versátiles y funcionan bien para una variedad de tareas, desde la base hasta la mezcla.
- cepillos planos son perfectos para la precisión, como aplicar delineador de ojos o corrector.
- cepillos en ángulo Ofrecen control y son excelentes para contornear o definir..
Considere la longitud y la densidad de las cerdas para aplicaciones específicas
Puedes pensar en lo que usas con más frecuencia y en cómo quieres que funcione tu cepillo., ya que afecta su longitud. Este paso suele tardar 1-2 horas para asegurarse de obtener la longitud y densidad de las cerdas adecuadas.
- Cerdas más largas proporcionar flexibilidad, haciéndolos ideales para mezclar.
- más corto, cerdas más densas ofrecer precisión y control, ideal para aplicar base o corrector.
Mango de diseño
Diseñar el mango no es sólo una cuestión de estética sino también de comodidad.. Por lo tanto, debes considerar la longitud del mango, diámetro, y textura para garantizar que se sienta bien en la mano. Un mango bien diseñado reduce la fatiga de la mano y mejora el control.. Crear un mango cómodo y elegante requiere aproximadamente 2-3 horas, incluyendo cualquier refinamiento necesario.
Paso 4: Logotipo y etiquetado personalizados
Un logotipo y una etiqueta personalizados en tus brochas de maquillaje, personalízalas y dales un toque profesional.. Este paso implica diseñar su logotipo y elegir el mejor método para aplicarlo a sus pinceles..
Comience diseñando un logotipo que represente su marca o estilo personal.. Este diseño debe ser simple pero distintivo., Ya que los detalles intrincados pueden ser difíciles de reproducir en superficies pequeñas.. Puede utilizar un software de diseño gráfico o contratar a un diseñador para crear un logotipo que se ajuste a su visión.. Luego considere cómo se verá el logotipo en diferentes materiales y escalas.. Una vez finalizado su diseño, Tendrás que elegir un método para aplicarlo a tus pinceles..
Imprimir logotipo
La impresión es un método popular para aplicar logotipos a mangos o casquillos de cepillos.. Este método utiliza tinta o tóner para transferir su diseño a la superficie.. Hay varias técnicas de impresión disponibles.:
- Tampografía: Ideal para pequeños, diseños intrincados, La tampografía utiliza una almohadilla de silicona para transferir tinta desde una placa a la superficie del pincel.. Es adecuado para imprimir en superficies curvas o irregulares..
- Serigrafía: Esta técnica consiste en empujar tinta a través de una malla hasta el mango del pincel.. Es muy adecuado para diseños más grandes y se puede realizar en varios colores..
- Impresión Digital: Para logotipos más detallados y coloridos, La impresión digital transfiere directamente la imagen de un archivo digital a la superficie utilizando impresoras especializadas..
Grabar logotipo
El grabado ofrece una forma más permanente y sofisticada de agregar su logotipo a los mangos o casquillos de los cepillos.. Este método implica el uso de un láser o una herramienta rotativa para grabar el diseño en la superficie.. El grabado proporciona una apariencia pulida y profesional que no desaparece con el tiempo.. Hay un par de métodos de grabado.:
- Grabado láser: Un grabador láser graba el diseño en la superficie con precisión. Es adecuado para varios materiales., incluyendo metal y madera, y produce limpio, resultados detallados.
- Grabado rotativo: Este método utiliza una broca giratoria para tallar el diseño en el material.. Es ideal para crear más profundidad., Grabados más táctiles y funciona bien en madera y metal..
Paso 5: Crea el cabezal del cepillo
Elaborar el cabezal del cepillo es un paso crucial que determina la efectividad y la calidad de tus pinceles de maquillaje personalizados.. Aquí se explica cómo perfeccionar cada aspecto del cabezal del cepillo., asegurando que satisfaga sus necesidades y preferencias específicas.
Cortar y dar forma a las cerdas
Primero, seleccione la longitud de las cerdas según lo que necesite. Las cerdas más largas son fantásticas para mezclar, mientras que los más cortos ofrecen más control para trabajos detallados. Utilice tijeras afiladas o una hoja de afeitar para recortar con cuidado las cerdas.. Es un poco como esculpir.; desea eliminar la cantidad justa para lograr la forma perfecta. Para un cepillo redondo, recorte para que los extremos queden redondeados y cónicos. Para un cepillo plano, asegúrese de que las cerdas estén uniformes en la parte superior. Este paso puede tomar aproximadamente 1-2 horas, dependiendo de qué tan preciso quieras ser y en cuántos pinceles estés trabajando.
Asegure las cerdas a la virola
Comience limpiando el interior de la férula para asegurarse de que esté libre de residuos.. Aplique un adhesivo fuerte a la base de las cerdas y al interior de la virola.. Sea generoso con el pegamento pero tenga cuidado de no excederse., ya que no quieres que se escape el exceso de adhesivo. Inserte suavemente las cerdas en la férula., asegurándose de que estén bien alineados. Utilice abrazaderas para mantener todo en su lugar mientras se seca el pegamento.. Este proceso suele tardar 1-2 horas, incluyendo el tiempo de secado. El objetivo aquí es garantizar que las cerdas permanezcan seguras en su lugar y no se muevan..
Consejos para diferentes tipos de cabezales de cepillo
Al crear cabezales de cepillo para diferentes aplicaciones de maquillaje, el enfoque cambia ligeramente. Cada tipo de cabezal de cepillo puede tardar aproximadamente 2-3 horas, incluido el tiempo para ajustar y probar su rendimiento.
- Para brochas de base, Querrás usar cerdas densas que puedan brindar una cobertura total.. Deben ser lo suficientemente firmes para aplicar la base de manera uniforme pero aún así flexibles para difuminar.. Una forma plana o ligeramente redondeada funciona mejor aquí..
- Para brochas de rubor, las cerdas deben ser más suaves y redondeadas para crear un color natural. Esta forma ayuda a difuminar el rubor perfectamente en las mejillas..
- cuando se trata de pinceles de sombra de ojos, tienes un poco mas de variedad. Pequeño, Los pinceles densos son perfectos para una aplicación precisa del color en los párpados., mientras más grande, Los pinceles más esponjosos son ideales para difuminar y difuminar sombras de ojos..
Paso 6: Coloque el mango del cepillo
Al colocar el mango es donde el cepillo comienza a unirse.. Este paso consiste en colocar el casquillo en el mango y finalizar el acabado del mango..
Coloque la férula en el mango
Puede alinear la férula con el mango y asegurar un ajuste perfecto.. La férula debe asentarse de forma segura en el extremo del mango sin espacios. Este proceso normalmente dura aproximadamente 30 minutos, incluida la verificación de la alineación adecuada.
Pegue y sujete la férula al mango
Puede aplicar adhesivo a la férula y colocarla en el mango.. Utilice abrazaderas para mantener todo en su lugar mientras se endurece el pegamento.. Este paso asegura una unión fuerte y un cepillo bien construido.. El pegado y la sujeción suelen tardar alrededor 1-2 horas, incluido el tiempo necesario para que se seque el adhesivo.
Finalizar el mango: Lijado, Caza de focas, y acabado
Una vez que el pegamento se haya secado, Lije el mango para suavizar las asperezas y mejorar su agarre.. Aplique un sellador o acabado para proteger el mango y darle un aspecto pulido.. Este proceso de retoque final dura aproximadamente 1-2 horas, asegurando que su mango se vea y se sienta genial.
Paso 7: Pinceles de prueba y perfectos
Probar y perfeccionar sus pinceles es el paso final para garantizar que cumplan con sus expectativas y funcionen perfectamente..
Verifique la alineación del cobertizo y las cerdas
Puede examinar su cepillo para detectar cualquier problema con la caída o la alineación de las cerdas.. La alineación adecuada garantiza una aplicación uniforme, mientras que el desprendimiento excesivo puede indicar la necesidad de un adhesivo más fuerte o ajustes. Esta verificación suele tardar aproximadamente 30 minutos.
Pruebe el rendimiento del pincel con diferentes productos de maquillaje
Puedes probar tu brocha con varios productos de maquillaje para evaluar su rendimiento.. Prueba qué tan bien aplica y difumina diferentes tipos de maquillaje.. Esta evaluación ayuda a identificar cualquier área que pueda necesitar mejora.. Las pruebas suelen tardar alrededor 1-2 horas.
Hacer ajustes: Guarnición, Apretando, y refinación
Basado en tus pruebas, hacer los ajustes necesarios. Recorta las cerdas para una mejor forma., apriete la férula si es necesario, y refinar el mango para mayor comodidad. Los ajustes y mejoras garantizan que su cepillo funcione tal como lo imaginó y normalmente toma aproximadamente 1-2 horas.
Conclusión
Si eres un aficionado al maquillaje o simplemente disfrutas de un proyecto creativo, aprender a crear tus propias brochas de maquillaje puede ser gratificante y práctico. Siguiendo estos pasos, Puedes crear pinceles que se adapten perfectamente a tus necesidades y preferencias., elevando tu rutina de belleza con herramientas personalizadas. Desde la selección de materiales hasta el perfeccionamiento del producto final, El proceso es una oportunidad para combinar el arte con la funcionalidad.. Adopte el enfoque de bricolaje y disfrute de la satisfacción de utilizar pinceles exclusivamente suyos..