Haben Sie sich jemals gefragt, ob Sie Ihre eigenen Make-up-Tools herstellen könnten?? Wenn ja, Du bist nicht allein. Viele Beauty-Enthusiasten sind neugierig, wie sie ihre eigenen Make-up-Pinsel herstellen können, um ein wirklich persönliches Erlebnis zu erzielen. Durch die Herstellung maßgeschneiderter Pinsel können Sie jeden Aspekt individuell anpassen – vom Borstentyp bis zum Griffdesign – und so sicherstellen, dass Ihre Werkzeuge genau Ihren Anforderungen entsprechen. In diesem Leitfaden, Wir begleiten Sie durch den Prozess des Entwerfens und Herstellens Ihrer eigenen Pinsel, Wir vermitteln Ihnen das Wissen und die Fähigkeiten, um Ihre Schönheitsroutine mit einem Hauch von DIY-Flair zu bereichern.

Schritt 1: Kennen Sie die Grundlagen von Make-up-Pinseln
Bevor wir uns auf die aufregende Reise begeben, eigene Make-up-Pinsel herzustellen, Beginnen wir mit dem Wesentlichen. In diesem Teil, Wir erklären Ihnen die Grundlagen der Pinseltypen, Materialien, und Borsteneigenschaften, die die Voraussetzungen für die Herstellung von Werkzeugen schaffen, die sowohl schön als auch funktional sind.
Übersicht über verschiedene Arten von Make-up-Pinseln

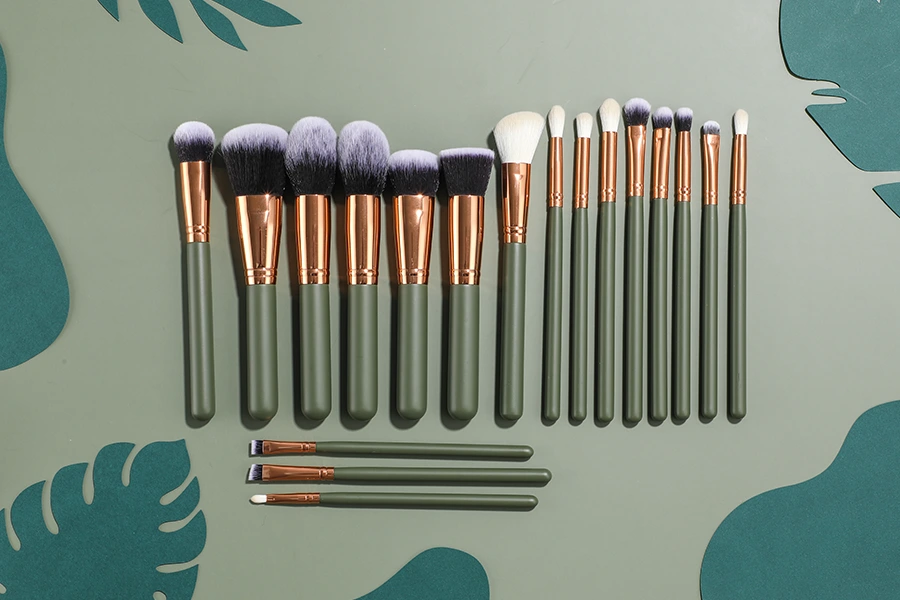
Stellen Sie sich jeden Pinsel als ein einzigartiges Werkzeug in Ihrem Beauty-Arsenal vor. Wenn Sie diese Typen kennen, können Sie die richtigen Formen für Ihre individuellen Kreationen auswählen.
- Foundation-Pinsel, mit ihrer Wohnung, dichte Borsten, sind perfekt für eine makellose Basis.
- Rougepinsel, mit ihrer abgerundeten Form, helfen Ihnen dabei, den perfekten Farbtupfer zu kreieren.
- Lidschattenpinsel reichen von klein, Präzise Designs für detaillierte Arbeiten bis hin zu größeren, flauschigere Optionen zum Mischen.
Materialien, die bei der Herstellung von Make-up-Pinseln verwendet werden: Borsten, Griffe, und Zwingen

Werfen wir einen Blick auf die Materialien, aus denen Ihre Pinsel bestehen.
- Borsten kann natürlich sein, wie weiches Eichhörnchen- oder Ziegenhaar, oder synthetisch, wie z. B. strapazierfähiges Nylon. Jeder Typ hat seinen eigenen Charme: Naturborsten eignen sich hervorragend zum Aufnehmen von Pigmenten, während Synthetik leicht zu reinigen ist und sich perfekt für cremige Produkte eignet.
- Griffe kann aus Holz hergestellt werden, Plastik, oder Metall, Jedes bietet ein einzigartiges Gefühl und Aussehen.
- Die Zwinge, diese entscheidende Metal-Band, hält alles zusammen – normalerweise aus Aluminium oder Messing gefertigt.
Die Rolle der Borstendichte und -form beim Auftragen von Make-up

Betrachten Sie die Dichte und Form der Borsten als die Persönlichkeit des Pinsels. Wenn Sie diese Details richtig machen, stellen Sie sicher, dass Ihr Pinsel genauso funktioniert, wie Sie es sich vorstellen.
- Dichte Borsten geben Ihnen Kontrolle und vollständige Abdeckung, Ideal für die Grundierung. Weniger dichte Borsten sorgen für ein weicheres Gefühl, Perfekt zum Verblenden und Verteilen.
- Die Form– ob rund, Wohnung, oder abgewinkelt – bestimmt, wie der Pinsel mit Ihrem Make-up und Ihrer Haut interagiert. Zum Beispiel, Ein Rundpinsel eignet sich hervorragend zum Verblenden, während ein flacher Lidschatten hervorragend zum Auftragen von Lidschatten geeignet ist.
Schritt 2: Sammeln Sie Materialien und Werkzeuge
Jetzt haben Sie die Grundlagen verstanden, Es ist Zeit, Ihre Materialien und Werkzeuge zusammenzusuchen. Jede Komponente ist entscheidend für die Herstellung eines Pinsels, der sowohl funktional als auch schön ist. Lassen Sie uns herausfinden, was Sie brauchen und warum.
Borsten: Natural vs. Synthetik
Natürliche Borsten, wie die aus Eichhörnchen- oder Ziegenhaar, sind wunderbar weich und halten die Pigmente wunderbar. Synthetische Borsten, ähnlich Öko-Bürsten, oft aus Nylon hergestellt, sind widerstandsfähiger und perfekt für flüssige und cremige Produkte geeignet. Wenn Sie einen Pinsel suchen, der leicht zu pflegen und langlebig ist, Synthetik könnte Ihre erste Wahl sein. Für einen Pinsel, der sich luxuriös anfühlt und gut mit Pudern funktioniert, Ziehen Sie Naturborsten in Betracht.
Griffmaterial: Holz, Plastik, oder Metall
Überlegen Sie, was sich gut in Ihrer Hand anfühlt und was zu Ihrer Ästhetik passt. Holzgriffe bieten einen Klassiker, angenehmer Griff und ein Hauch von Eleganz, aber sie erfordern etwas mehr Pflege. Kunststoffgriffe sind leicht und kostengünstig, während Metallgriffe, wie solche aus Aluminium oder Messing, Bringen Sie ein modernes, langlebige Haptik.
Zwinge: Metallarten
Die Zwinge, oft übersehen, ist entscheidend für den Halt der Borsten. Aluminiumhülsen sind leicht und korrosionsbeständig, was sie zu einer praktischen Wahl macht. Messinghülsen, wenn auch schwerer, Bieten Sie eine solide, luxuriöses Gefühl.
Werkzeuge, die Sie benötigen: Kleber, Klemmen, und mehr
Zum Zusammenbauen Ihrer Bürste, Sie benötigen einige wichtige Werkzeuge. Zur Befestigung der Borsten an der Zwinge ist ein starker Kleber erforderlich. Klammern helfen dabei, alles an Ort und Stelle zu halten, während der Kleber aushärtet. Außerdem benötigen Sie Schneidwerkzeuge, um die Borsten zu formen. Wenn Sie diese Tools bereithalten, wird Ihr Prozess rationalisiert und sichergestellt, dass alles aufeinander abgestimmt bleibt.
Schritt 3: Design-Make-up-Pinsel
Beim individuellen Pinseldesign können Sie Ihrer Kreativität freien Lauf lassen. In diesem Schritt geht es darum, die Form zu bestimmen, Borsteneigenschaften, und Griffdesign passend zu Ihren Bedürfnissen und Vorlieben.
Benutzerdefinierte Pinselform: Runden, Wohnung, Abgewinkelt, und mehr
Die Form Ihres Pinsels beeinflusst seine Leistung. Es kann einige Zeit dauern, bis Sie entscheiden, welche Formen am besten zu Ihrer Make-up-Routine passen. Dieser Schritt kann ca. dauern 2 Std., einschließlich Anpassungen und Tests.
- Rundbürsten sind vielseitig und eignen sich gut für eine Vielzahl von Aufgaben, Von der Grundierung bis zum Verblenden.
- Flache Pinsel sind perfekt für Präzision, wie das Auftragen von Eyeliner oder Concealer.
- Abgewinkelte Bürsten bieten Kontrolle und eignen sich hervorragend zum Konturieren oder Definieren.
Berücksichtigen Sie die Länge und Dichte der Borsten für bestimmte Anwendungen
Denken Sie vielleicht darüber nach, was Sie am häufigsten verwenden und welche Leistung Ihr Pinsel haben soll, da es seine Länge beeinflusst. Dieser Schritt dauert normalerweise 1-2 Stunden, um sicherzustellen, dass Sie die richtige Borstenlänge und -dichte erhalten.
- Längere Borsten Flexibilität bieten, Dadurch eignen sie sich hervorragend zum Mischen.
- Kürzer, dichtere Borsten bieten Präzision und Kontrolle, Ideal zum Auftragen von Foundation oder Concealer.
Design-Griff
Bei der Gestaltung des Griffs geht es nicht nur um Ästhetik, sondern auch um Komfort. daher, Sie sollten die Länge des Griffs berücksichtigen, Durchmesser, und Textur sorgen dafür, dass es sich gut in der Hand anfühlt. Ein gut gestalteter Griff verringert die Ermüdung der Hand und verbessert die Kontrolle. Die Herstellung eines bequemen und stilvollen Griffs dauert ca 2-3 Std., einschließlich aller notwendigen Verfeinerungen.
Schritt 4: Individuelles Logo und Beschriftung
Ein individuelles Logo und Etikett auf Ihren Make-up-Pinseln personalisieren sie und verleihen ihnen eine professionelle Note. In diesem Schritt müssen Sie Ihr Logo entwerfen und die beste Methode zum Auftragen auf Ihre Pinsel auswählen.
Beginnen Sie mit der Gestaltung eines Logos, das Ihre Marke oder Ihren persönlichen Stil repräsentiert. Dieses Design sollte einfach und dennoch unverwechselbar sein, da es schwierig sein kann, komplizierte Details auf kleinen Flächen zu reproduzieren. Sie können eine Grafikdesign-Software verwenden oder einen Designer damit beauftragen, ein Logo zu erstellen, das Ihren Vorstellungen entspricht. Überlegen Sie dann, wie das Logo auf verschiedenen Materialien und Maßstäben aussehen wird. Sobald Ihr Entwurf fertiggestellt ist, Sie müssen eine Methode zum Auftragen auf Ihre Pinsel auswählen.
Logo drucken
Das Drucken ist eine beliebte Methode zum Aufbringen von Logos auf Pinselstiele oder Zwingen. Bei dieser Methode wird Ihr Design mit Tinte oder Toner auf die Oberfläche übertragen. Es stehen verschiedene Drucktechniken zur Verfügung:
- Tampondruck: Ideal für kleine, komplizierte Designs, Beim Tampondruck wird mit einem Silikonkissen Tinte von einer Platte auf die Pinseloberfläche übertragen. Es eignet sich zum Drucken auf gekrümmten oder unregelmäßigen Oberflächen.
- Siebdruck: Bei dieser Technik wird Tinte durch ein Maschensieb auf den Pinselgriff gedrückt. Es eignet sich gut für größere Designs und kann in mehreren Farben ausgeführt werden.
- Digitaldruck: Für detailliertere und farbenfrohere Logos, Beim Digitaldruck wird das Bild mithilfe spezieller Drucker direkt aus einer digitalen Datei auf die Oberfläche übertragen.
Logo eingravieren
Die Gravur bietet eine dauerhaftere und raffiniertere Möglichkeit, Ihr Logo auf Pinselgriffen oder Zwingen anzubringen. Bei dieser Methode wird das Design mit einem Laser oder einem rotierenden Werkzeug in die Oberfläche geätzt. Die Gravur sorgt für ein poliertes und professionelles Aussehen, das sich mit der Zeit nicht abnutzt. Es gibt verschiedene Gravurmethoden:
- Lasergravur: Ein Lasergravierer brennt das Design präzise in die Oberfläche. Es ist für verschiedene Materialien geeignet, einschließlich Metall und Holz, und produziert sauber, detaillierte Ergebnisse.
- Rotationsgravur: Bei dieser Methode wird ein rotierender Bohrer verwendet, um das Design in das Material zu schnitzen. Es ist ideal, um tiefer zu kreieren, fühlbarere Gravuren und eignet sich gut für Holz und Metall.
Schritt 5: Stellen Sie den Bürstenkopf her
Die Herstellung des Bürstenkopfes ist ein entscheidender Schritt, der die Wirksamkeit und Qualität Ihrer individuellen Make-up-Pinsel bestimmt. So perfektionieren Sie jeden Aspekt des Bürstenkopfs, Stellen Sie sicher, dass es Ihren spezifischen Bedürfnissen und Vorlieben entspricht.
Borsten schneiden und formen
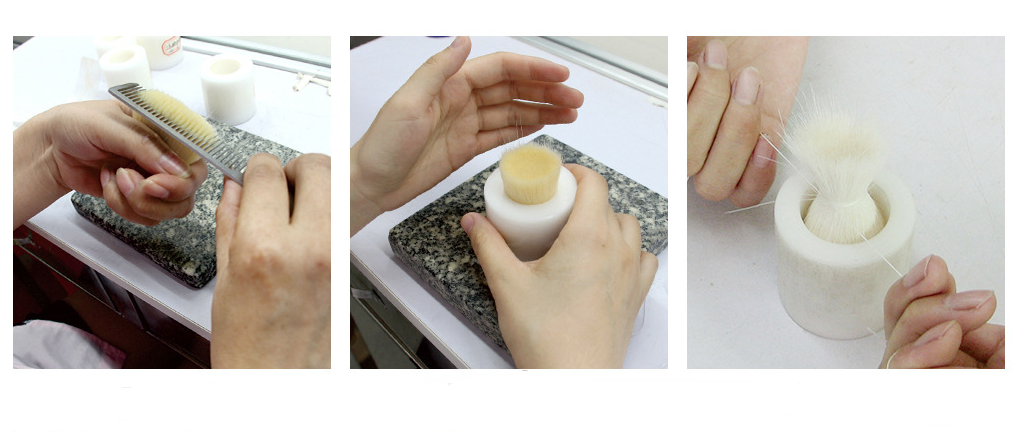
Erste, Wählen Sie die Länge der Borsten je nach Bedarf. Längere Borsten eignen sich hervorragend zum Verblenden, während kürzere Modelle mehr Kontrolle für detaillierte Arbeiten bieten. Schneiden Sie die Borsten vorsichtig mit einer scharfen Schere oder einer Rasierklinge ab. Es ist ein bisschen wie Bildhauerei; Sie möchten genau die richtige Menge entfernen, um die perfekte Form zu erreichen. Für eine Rundbürste, so zuschneiden, dass die Enden abgerundet und spitz zulaufen. Für einen Flachpinsel, Stellen Sie sicher, dass die Borsten gleichmäßig über die Oberseite verteilt sind. Dieser Schritt kann ca. dauern 1-2 Std., Je nachdem, wie präzise Sie sein möchten und an wie vielen Pinseln Sie arbeiten.
Befestigen Sie die Borsten an der Zwinge
Reinigen Sie zunächst die Innenseite der Zwinge, um sicherzustellen, dass sie frei von Rückständen ist. Tragen Sie einen starken Kleber auf die Borstenbasis und die Innenseite der Zwinge auf. Seien Sie großzügig mit dem Kleber, aber achten Sie darauf, es nicht zu übertreiben, da Sie nicht möchten, dass überschüssiger Kleber austritt. Führen Sie die Borsten vorsichtig in die Zwinge ein, Stellen Sie sicher, dass sie gut ausgerichtet sind. Benutzen Sie Klammern, um alles an Ort und Stelle zu halten, während der Kleber trocknet. Dieser Vorgang dauert normalerweise 1-2 Std., einschließlich der Trocknungszeit. Ziel ist es, sicherzustellen, dass die Borsten sicher an Ort und Stelle bleiben und nicht verrutschen.
Tipps für verschiedene Arten von Bürstenköpfen
Bei der Herstellung von Bürstenköpfen für verschiedene Make-up-Anwendungen, Der Ansatz ändert sich geringfügig. Jeder Bürstenkopftyp kann ca 2-3 Std., einschließlich der Zeit, ihre Leistung zu optimieren und zu testen.
- Für Foundation-Pinsel, Sie sollten dichte Borsten verwenden, die eine vollständige Abdeckung bieten. Sie sollten fest genug sein, um die Foundation gleichmäßig aufzutragen, aber dennoch flexibel zum Verblenden. Hier eignet sich am besten eine flache oder leicht abgerundete Form.
- Für Rougepinsel, Die Borsten sollten weicher und abgerundet sein, um einen natürlichen Farbverlauf zu erzeugen. Diese Form hilft dabei, das Rouge nahtlos auf den Wangen zu verteilen.
- Wenn es darum geht Lidschattenpinsel, da hast du etwas mehr Abwechslung. Klein, dichte Pinsel eignen sich perfekt für den präzisen Farbauftrag auf den Lidern, während größer, Flauschigere Pinsel eignen sich ideal zum Verblenden und Verteilen von Lidschatten.
Schritt 6: Befestigen Sie den Bürstengriff
Wenn Sie den Griff anbringen, beginnt Ihr Pinsel zusammenzupassen. Dieser Schritt umfasst das Anbringen der Zwinge am Griff und die endgültige Endbearbeitung des Griffs.
Bringen Sie die Zwinge am Griff an
Sie können die Zwinge am Griff ausrichten und auf einen festen Sitz achten. Die Zwinge sollte sicher und lückenlos am Griffende sitzen. Dieser Vorgang dauert normalerweise ca 30 Minuten, einschließlich der Überprüfung der korrekten Ausrichtung.
Kleben und klemmen Sie die Zwinge am Griff fest
Sie können die Zwinge mit Klebstoff versehen und am Griff befestigen. Verwenden Sie Klammern, um alles an Ort und Stelle zu halten, während der Kleber aushärtet. Dieser Schritt gewährleistet eine starke Verbindung und einen gut konstruierten Pinsel. Das Kleben und Spannen dauert in der Regel ca 1-2 Std., einschließlich der Zeit, die der Kleber zum Trocknen benötigt.
Finalisieren Sie den Griff: Schleifen, Versiegelung, und Fertigstellung
Sobald der Kleber getrocknet ist, Schleifen Sie den Griff ab, um raue Stellen zu glätten und die Griffigkeit zu verbessern. Tragen Sie eine Versiegelung oder ein Finish auf, um den Griff zu schützen und ihm ein poliertes Aussehen zu verleihen. Dieser letzte Ausbesserungsvorgang dauert ca 1-2 Std., Stellen Sie sicher, dass Ihr Griff gut aussieht und sich gut anfühlt.
Schritt 7: Test- und perfekte Pinsel
Das Testen und Perfektionieren Ihrer Pinsel ist der letzte Schritt, um sicherzustellen, dass sie Ihren Erwartungen entsprechen und einwandfrei funktionieren.
Überprüfen Sie die Ausrichtung von Schuppen und Borsten
Sie können Ihren Pinsel auf Probleme mit dem Ablösen oder der Ausrichtung der Borsten untersuchen. Die richtige Ausrichtung gewährleistet eine gleichmäßige Anwendung, Während übermäßiges Ablösen möglicherweise darauf hindeutet, dass ein stärkerer Kleber oder Anpassungen erforderlich sind. Diese Überprüfung dauert normalerweise ca 30 Minuten.
Testen Sie die Pinselleistung mit verschiedenen Make-up-Produkten
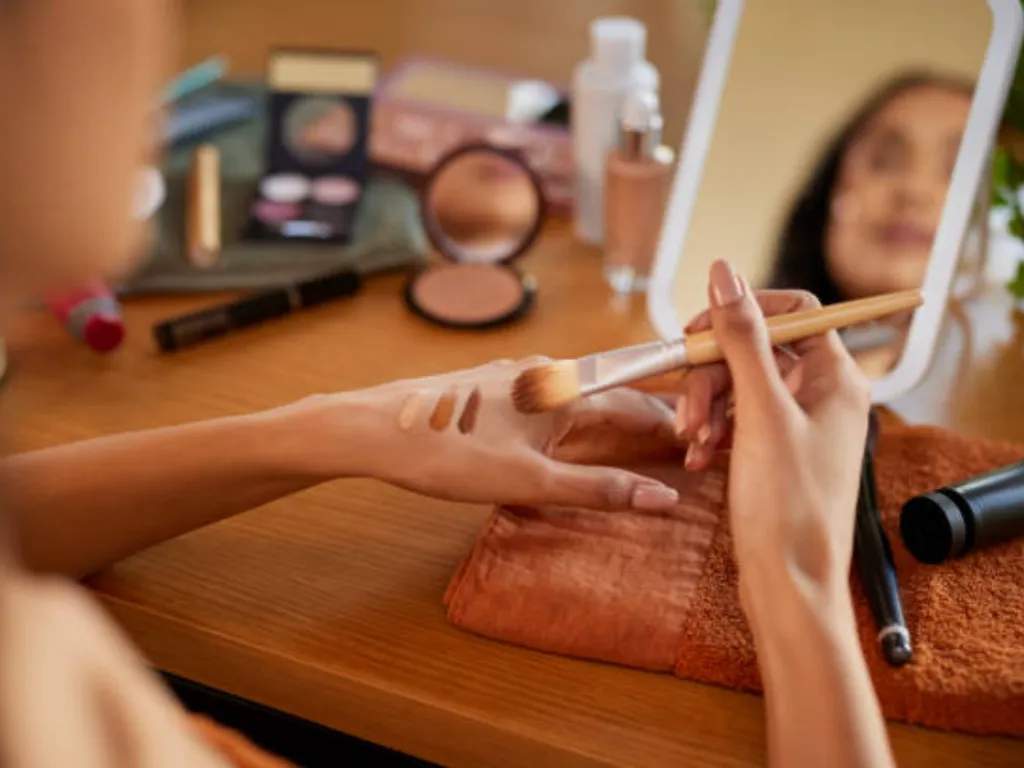
Sie können Ihren Pinsel mit verschiedenen Make-up-Produkten ausprobieren, um seine Leistung zu beurteilen. Testen Sie, wie gut es verschiedene Arten von Make-up auftragen und verblenden kann. Diese Bewertung hilft dabei, Bereiche zu identifizieren, die möglicherweise verbessert werden müssen. Das Testen dauert in der Regel ca 1-2 Std..
Nehmen Sie Anpassungen vor: Trimmen, Anziehen, und Verfeinerung
Basierend auf Ihren Tests, Nehmen Sie ggf. erforderliche Anpassungen vor. Schneiden Sie die Borsten für eine bessere Form ab, Ziehen Sie die Zwinge bei Bedarf fest, und verfeinern Sie den Griff für mehr Komfort. Anpassungen und Verfeinerungen stellen sicher, dass Ihr Pinsel genau so funktioniert, wie Sie es sich vorgestellt haben, und normalerweise in etwa so lange dauert 1-2 Std..
Abschluss
Egal, ob Sie ein Make-up-Fan sind oder einfach nur Freude an einem kreativen Projekt haben, Zu lernen, wie man seine eigenen Make-up-Pinsel herstellt, kann erfüllend und praktisch sein. Indem Sie diese Schritte befolgen, Sie können Pinsel herstellen, die perfekt Ihren Bedürfnissen und Vorlieben entsprechen, Verbessern Sie Ihre Schönheitsroutine mit personalisierten Tools. Von der Materialauswahl bis zur Perfektionierung des Endprodukts, Der Prozess ist eine Gelegenheit, Kunstfertigkeit mit Funktionalität zu verbinden. Machen Sie sich den DIY-Ansatz zu eigen und genießen Sie die Befriedigung, Pinsel zu verwenden, die einzigartig für Sie sind.


